Author Topic: Troubleshooting a JAP Special  (Read 269575 times)

Offline Rex

  • Advanced Member
  • ***
  • Posts: 1615
  • Karma: +12/-69
  • I love YaBB 1G - SP1!
    • View Profile
Re: Troubleshooting a JAP Special
« Reply #300 on: November 12, 2026, 09:43:25 PM »
I'd reuse the barrel and piston as-is if it was my hand on the purse strings. No new or even appreciable damage as far as I can see.

Offline R

  • Advanced Member
  • ***
  • Posts: 1688
  • Karma: +26/-10
    • View Profile
Re: Troubleshooting a JAP Special
« Reply #301 on: November 12, 2026, 10:45:07 PM »
if it was my hand on the purse strings

Yes, if there is no danger of any ongoing damage, then it should still be reasonably serviceable.

Hopefully someone changed the oil since that saga ..

Offline Rockburner

  • Advanced Member
  • ***
  • Posts: 186
  • Karma: +0/-1
  • Non quod, sed quomodo
    • View Profile
Re: Troubleshooting a JAP Special
« Reply #302 on: November 13, 2026, 01:05:03 PM »
if it was my hand on the purse strings

Yes, if there is no danger of any ongoing damage, then it should still be reasonably serviceable.

Hopefully someone changed the oil since that saga ..

Yup - that's the current thinking.

The engine has been in component pieces since any of that damage was done (probably more than once), so I'm not worried about that.

Offline Rockburner

  • Advanced Member
  • ***
  • Posts: 186
  • Karma: +0/-1
  • Non quod, sed quomodo
    • View Profile
Re: Troubleshooting a JAP Special
« Reply #303 on: November 13, 2026, 08:00:48 PM »
Well - it's a  good thing I didn't just go and blow a wad of cash on parts....

Because I found the other head that I completely forgot I had tucked away! :D
I was taking the time to have a partial "audit" of JAPton spares because I though I might have a spare set of valve-stem circlips (see later)

Nice clean spare exhaust valve from Head 2 (that I bought at Beaulieau a couple of years ago),


I dug out the old 11/32" reamer that I knew I had, and fineagled a tap handle onto it to check the exhaust guide


The Guru, when I spoke to him yesterday, said that the guides tend to blunt reamers for fun, and I think that's happened to this one.  The guide resolutely refused to be thoroughly reamed (phnarr), so I'm going to wait for the new reamer to turn up.

As an aside... aren't these cute?

(they're modern repro tat, obviously, but they're fun)

I picked them up from a Retro-Vintage shop in Chichester a few years ago...
they're very handy!


It then occurred to me that I also had a pair of valve guides that might be worth checking out... so I dug out the box of drifts


and belted out the current one


Gungy valve-stem-feed passage


Soon cleared!


I then belted the exhaust guide out of the "spare" head


"Spare" on left, "current" on right


I then ALSO remembered that I had a guide and valve on the "Offerings to the God of Speed" shelf, so I got them back down to have a comparison session.


Interestingly, the guide that was on the "knackered" shelf (the small one on the right) is, I think, slightly tighter on the "spare" exhaust valve stem than the one I pulled out of the spare head! That does make a certain amount of logical sense, because I know that head 2 is very very tired (the valve seats are deeply pocketed and need to be replaced.

The observant among you will note that there are 4 valves there....

I found another one in the tin, it's older, and I think it came from my Dad's supply.  I think it's ever so slightly bent, which may make it defunct, and the end of the stem is battered to hell, so it won't go into any of the guides.  I will likely tidy up the top end just to see if it's usable or not, if not it'll just go up on the Offerings shelf along with the others.

I now just need to wait for the reamer to turn up so that I can see if the "tight" guide can be opened up again to be usable, and if not, then make a decision about which one to use.  I don't mind having one that's a tad on the loose side, because, if it oils up again, there's a bit more play to allow for it.

I also was advised by the Guru that it's a nice idea to have a clear tube feeding the oil to the head, so you can check the oil is getting up there sufficiently.  I think this might be a good idea because it's nigh on impossible with the Pilgrim to see exactly how much is getting up there, and I definitely think I have over-oiled the head.  So I dug around to see if I have any suitably sized banjo bolts.   Nada. Quite a lot of metric ones though... hhmmm I wonder if could just drill a couple of them out....might be worth a try.  Otherwise there's a Kempton event on the 5th December (if I can wake up in time...), or get a couple from Speedways, I need to buy a couple of valve-stem-circlips from them anyway (will probably buy a handful, they do tend to get bent when being removed). I've got a fair bit of odds-and-sods clear tube, and it doesn't need to be particularly strong because it's relatively low-pressure.  Apparently you can see the oil travelling up in "lumps" (sic) about an inch long, with a half-inch bubble of air between them!  Looking forward to seeing that! :D

But right now, it's friggin freezing out here, I need a beer.

Offline 33d6

  • Advanced Member
  • ***
  • Posts: 1216
  • Karma: +27/-4
  • I love YaBB 1G - SP1!
    • View Profile
Re: Troubleshooting a JAP Special
« Reply #304 on: November 14, 2026, 06:36:56 AM »
Personal experience with ancient Pilgrim lubricated side valves showed me the inlet valve to be the troublesome one as it got no lubrication at all. The exhaust valve was no problem as enough oil got past the rings (compression rings only, no oil scraper ring). It did eventually get sticky but only after a considerable mileage.
Inlet problem eventually mostly solved with modern high temperature silicon grease. Could still get sticky but took much longer and was more predictable. In your case I would cheerfully apply a smear of silicon grease to the valve stem even though you get a dribble of oil from the Pilgrim. A spit and dribble is about all it needs anyway. The inlet guide needs little lubrication but it does need some.

With current engines running far tighter guide tolerances than was once the case they have given us unreal expectations for what to expect from earlier engines. I suspect the oldies ran with far greater clearances than we feel comfortable with.

Best of luck with it.
 

Offline Rockburner

  • Advanced Member
  • ***
  • Posts: 186
  • Karma: +0/-1
  • Non quod, sed quomodo
    • View Profile
Re: Troubleshooting a JAP Special
« Reply #305 on: November 14, 2026, 11:11:47 PM »
Personal experience with ancient Pilgrim lubricated side valves showed me the inlet valve to be the troublesome one as it got no lubrication at all. The exhaust valve was no problem as enough oil got past the rings (compression rings only, no oil scraper ring). It did eventually get sticky but only after a considerable mileage.
Inlet problem eventually mostly solved with modern high temperature silicon grease. Could still get sticky but took much longer and was more predictable. In your case I would cheerfully apply a smear of silicon grease to the valve stem even though you get a dribble of oil from the Pilgrim. A spit and dribble is about all it needs anyway. The inlet guide needs little lubrication but it does need some.

With current engines running far tighter guide tolerances than was once the case they have given us unreal expectations for what to expect from earlier engines. I suspect the oldies ran with far greater clearances than we feel comfortable with.

Best of luck with it.
 

My current thinking is to use a guide with a looser tolerance for the exhaust valve. (Along with a few other modifications/adjustments). If it's prone to nipping up, then it makes sense to me to make the fit a tad looser.

As you say, the tolerances on these older designs can be much more open and they're still happy.
« Last Edit: November 15, 2026, 11:44:33 AM by Rockburner »

Offline Rockburner

  • Advanced Member
  • ***
  • Posts: 186
  • Karma: +0/-1
  • Non quod, sed quomodo
    • View Profile
Re: Troubleshooting a JAP Special
« Reply #306 on: Today at 07:38:10 PM »
..... continued......

This evening I started by running the new 11/32" reamer through the "current" exhaust guide


A lot more swarf than I expected.


And there was definitely a tight spot about half way down... odd.

I'd already pretty much decided to use the "spare" guide anyway, going on the premises that:
a) a looser fit would reduce the chances of the guide nipping up on the stem in a catastrophic manner,
b) these older engines are generally perfectly happy with looser tolerances than modern machinery
c) I'm not racing the bugger, just riding for fun. :D

So - I cleaned up the "spare" guide


Before having a good go at cleaning the carbon out of the head


The main reason for this is to give me a clean field of play for getting the valves ground in, ie so I can see what i'm doing! :D

I left that to percolate for a bit and turned my attention to the inlet valve. I fitted it into the drill-press. The idea here is to grind away the outer diameter "just enough" so that there's still plenty of "land" for the seat-seal, but as little excess outside that diameter as reasonably possible.


About half-way through....
The burnt on carbon is the perfect marker to use as a guide - I'm aiming for a pin-line of carbon being left.


At that point I remembered 2 things.
1 I really should have measured the outer diameter of the valve before starting..... D'oh!
2 I have a spare!  So I dug it out and measured the outer diameter


The 'spare' is significantly smaller diameter than the 'current'


BUT - the 'spare' wasn't a good fit in the current guide, so I carried on, and worked the 'current' valve down to a similar outer diameter


I used 3 different files to get the valve ground down, a very rough one actually did most of the work, then I tidied with a relatively fine one.

Valve head profiles : 'current' (modified) on left, 'spare' on right.


I then tidied up the outside with 350 and then 600 wet&dry.


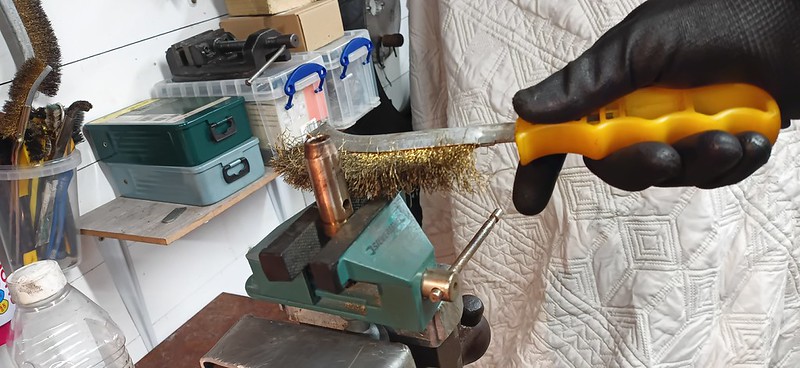
Then I started working the carbon deposit with a gentle brass brush


After only 20 minutes or so...
You can clearly see the valve-seat inserts.
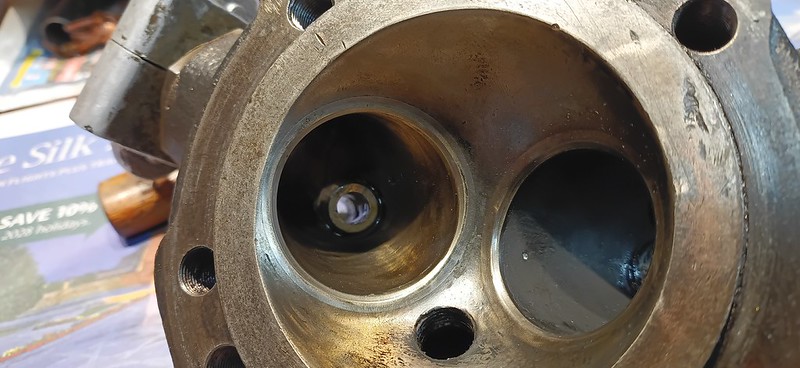

for reference, I'm NOT cleaning out the exhaust manifold. I read something in "Tuning for Speed" about this: Vincent reckoned that the carbon coating served as an insulating layer and reduced the amount of heat energy transferred to the head.  Worth a try!


I then smacked the exhaust guide back into the head...
... ensuring the oiling hole was in line.. (ahem)


Cleaning the carbon off the inlet valve head


Prepping the valve head for grinding the seat


Start with the coarse.


The best tool for this job (far better than the stupid suction cups on wooden sticks)


In progress


There was a slight hiatus when making an adjustment ... I took the valve out to scrape some of the grinding paste off the inner head back onto the seal area because I was trying to give it a really good grind (for a couple of reasons), and inadvertently, due to my usual ham-fisted-ness, snapped the fixing screw on the tool!


Amazingly I found a replacement quite quickly!


Post coarse grinding seat:


Obviously this grind has to be a good one because this valve hasn't been in this head before, AND if I can pull the valve back into the head by a few microns, it's another mitigation of the potential for valve-valve contact.


And that's where I decided to stop for the evening.  Next visit will be more valve-grinding: the Fine grind of the exhaust, and the Coarse and Fine grind of the inlet (again, try to pull it back into the head a little bit).  Then reassemble the head, check the seals, and continue on.....